Think you’ve explored everything your Android smartphone’s Settings app has to offer? Think again.
Deep within Settings, you’ll find a hidden Developer menu with an extensive list of settings you can tweak to improve your overall smartphone experience. Here are some developer settings I highly recommend that every Android user enable on their device.
How to enable the developer menu on your Android phone
Since the developer settings are primarily intended for Android developers, Google keeps them hidden from general users.
To access them, you first need to unlock the Developer menu, which contains all these options. The process may vary slightly across different Android smartphones, but the general rule of thumb is to open the Settings app, go to About Phone, and tap the Build Number seven times. You’ll then see a “You’re now a developer” message confirming that the Developer menu has been unlocked on your smartphone.
Aman Kumar / Foundry
The location of the Developer menu may vary across different Android smartphones. On my Pixel 10, it’s found under the System option in the Settings app. On Samsung Galaxy phones, it appears near the bottom of the Settings app. You can also use the search function in the Settings app to look for the Developer menu if you’re unable to find it manually.
Show taps
If you create video tutorials on your Android smartphone, you should enable the Show Taps toggle in the Developer menu. As the name suggests, this option displays a small translucent circle wherever you touch the screen.
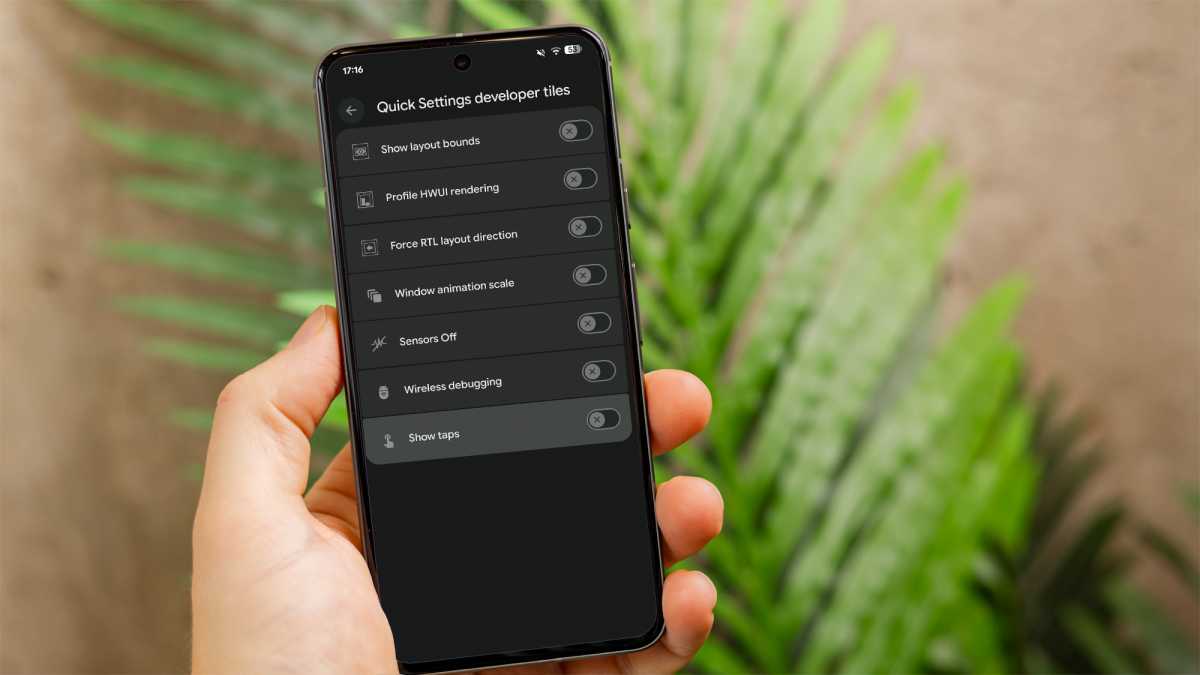
Enabling this option eliminates the need to add an external pointer to your video during editing when you want to highlight exactly where the user needs to tap to access something you’re showcasing. You will find the Show Taps toggle under the Input section.
Default USB configuration
Whenever you connect your smartphone to a Windows PC, you’ll see a pop-up on your phone asking what action you want to perform. You’ll get options like File transfer, which lets you transfer data between your smartphone and the connected PC; Webcam, which allows your smartphone to function as the connected PC’s webcam; or No data transfer, which you can select if you only want to charge your smartphone through the connected PC.
While all these options let you perform a variety of tasks, choosing one each time can become an extra step, especially if you always connect your smartphone to the PC for a single specific purpose, such as transferring data.
In that case, you should select the Default USB configuration option in the Developer menu and choose the default action you want to perform whenever your smartphone is connected to a PC. The Default USB configuration option can be found under the Networking section.
Aman Kumar / Foundry
Use every app in split screen
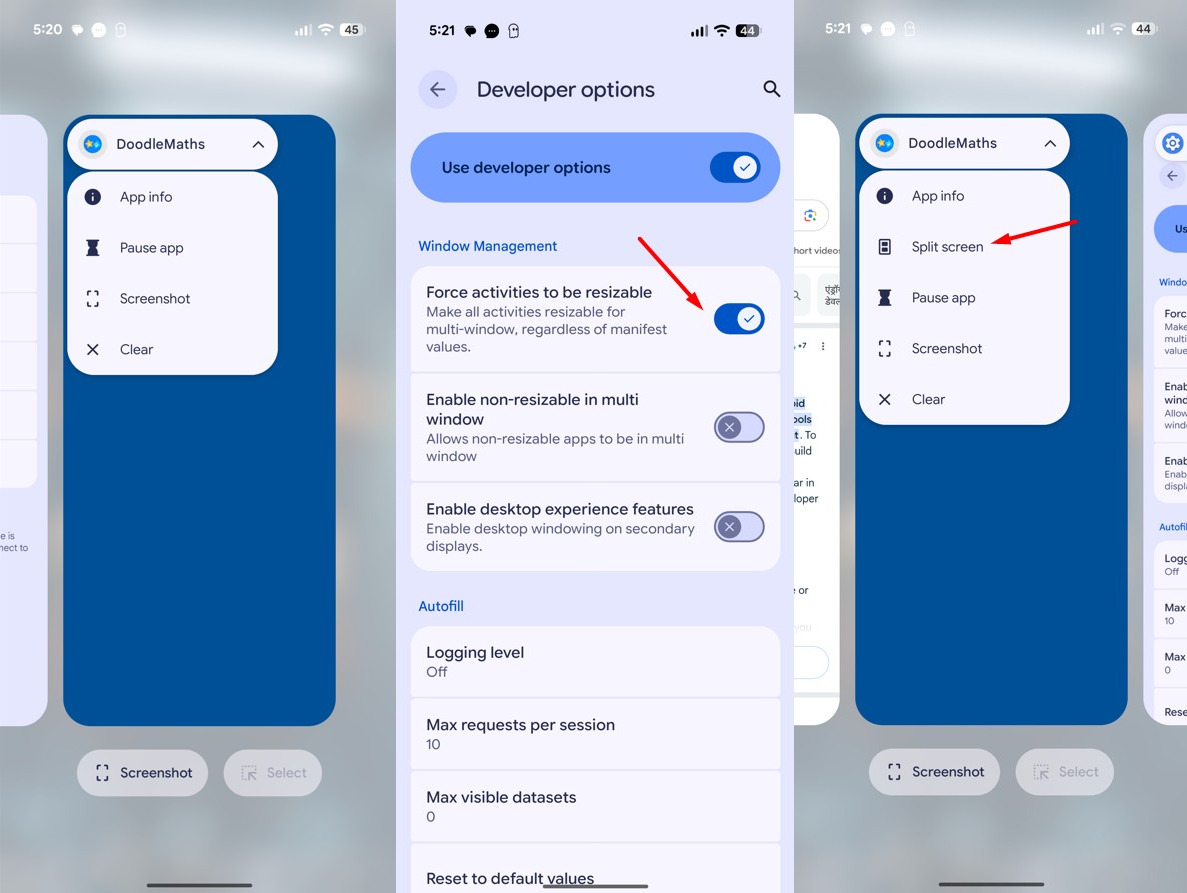
The split-screen functionality on your Android smartphone allows you to work on two apps simultaneously. However, there’s still a long list of apps, such as DoodleMaths, that don’t support this feature. When you open the app drawer on your smartphone and tap the name of one of these apps, you won’t see the Split Screen option that appears for apps supporting this functionality.
Fortunately, there’s a developer setting called Force activities to be resizable that brings the split-screen feature to all the apps installed on your device, even if they don’t support it by default. The option is located under the Window Management section, and once you enable it, you’ll see the Split Screen option when you tap any app name in the app drawer.
Aman Kumar / Foundry
Always enjoy peak refresh rate
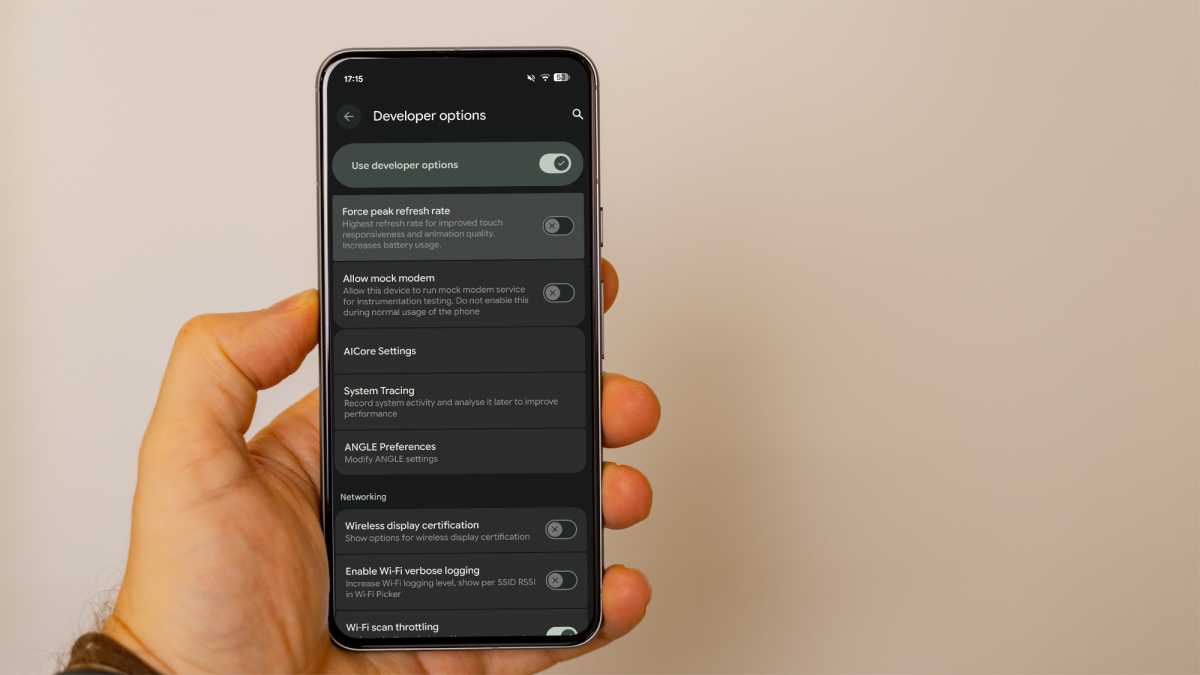
While LTPO displays have become increasingly common in modern smartphones, there is still a long list of devices that don’t include them – the Pixel 10, for example. The availability of an LTPO display allows your smartphone to adjust its refresh rate from the peak all the way down to as low as 1Hz.
On a device like the Pixel 10, which features a non-LTPO 120Hz display, you’ll get a refresh rate of either 120Hz or 60Hz, depending on the task you’re performing.
While you wouldn’t face a major issue due to this fluctuation during day-to-day smartphone tasks, it can significantly affect your gaming performance. Imagine you’re in the middle of a fight in a battle royale game like PUBG, and the refresh rate suddenly drops to 60Hz. You would experience sudden lag on your device, which could eventually cost you the game.
Foundry
You can prevent such situations by enabling a developer setting called Force peak refresh rate. As the name suggests, this setting configures your device to always use the highest refresh rate it supports. Enabling this on my Pixel 10 makes it consistently run at 120Hz. However, it’s worth noting that since your device will always operate at its peak refresh rate, you may experience slightly reduced battery life as a result.
Improve your phone’s speed and feel
If you have a very old smartphone, I highly recommend changing the animation speed to make it noticeably faster. There are two developer settings you need to adjust for this – Window Animation Scale and Transition Animation Scale.
Aman Kumar / Foundry
You will find both of these options under the Drawing section, and you need to select 0.5x for both of them. In case you want to better observe the animation of an app, you should choose 5x for both options, which will slow down all the animations. This way, you will be able to clearly observe how an app opens and closes on your smartphone and how all its transitions are performed.
Looking for more Android content? Read our separate articles on hidden camera features to improve your photos and pointless features that you should ignore.